Saturday, December 07, 2013

Two Turtle Doves.

I'm now on the second card of my self imposed  challenge for depicting the 12 days of Christmas. This card is a bit tongue in cheek as the digi is actually Wedding Doves but with a different colour, the addition of a poinsettia and some bling I give you

Two turtle Doves.
Digi image by Becc'ys Place.
(I fell in love with this image as soon as I saw it so knew I had found my Doves).
Image coloured using Graph'it pens and pearlescent chalks
Blooming Poinsettia die is by Poppystamps.com
Layered onto pale green card stock  and then matted onto white card.
Sentiment generated in word.
Off cuts of white card (coloured as above) for the poinsettias and gems from my stash.
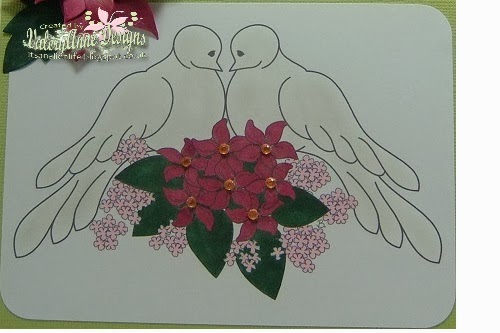
Close up of the Doves which were 1st coloured in with a blender pen  and then covered with both white and light grey pearlescent chalks which I think you can just about see here.
 
Entering into the following challenges:
Make My Monday: Christmas flowers and Foliage.
Holly Jolly Christmas: Anything goes Christmas.
Sweet Stamps #146: Red & Green.
LEJ Designs #82: Christmas is coming.
Polka Doodles Digi Choosday #7: Christmas cheer.
Delightful Challenges: Add gems of any kind.
Paper Crafting Journey: It's Christmas time.
C.R.A.F.T. challenge #236: Christmas.
Stampin For The Weekend: Use some Red.
Crafty Hazelnuts Extra: Anything goes Christmassy.


S is for Silhouette

 The current letter to be used over at The Craft Barn for their Alpha challenge is the letter S.  I have gone with the word silhouette.


Page has been given a wash with a paint pots sampler ' White cotton' and the rest left white.
Silhouette is from my Dover Clip Art CD rom which comes with a book showing all the silhouettes available on the CD.
I have used the Sizzix alphabet Die 656133 for the letter S and mounted on a small piece of black card. I have left the page simple to follow the black and white theme.
Only 2 letters left to go and my book will be complete!

Entering into the following challenge:
The Craft Barn Alpha challenge: Use the letter S.

Ps. Pop back later today to see the  '2nd' day of Christmas card.

Thursday, December 05, 2013

Partridge in a Pear Tree.

There haven't been any  Christmas type swaps this year that have caught my eye so I decided  to challenge myself to see if I could come up with a set of cards for the 12 days of Christmas. I also decided to use digi's for the design and use a different web site/shop for each of them.
So without further ado here is my card for The first day of  Christmas.
A Partridge in a Pear Tree.


Digi image by Stitchy Bear
Coloured in using Graph'it pens and a gold gel pen.
sentiment generated in word.
Mounted onto thick  yellow card and then  gold shimmer paper.


Entering into the following challenges:
Suzy Bee's Bloomin  challenge blog #5: Anything goes.
Pile It On #48: P is for------  Partridge, Pear, Paper.
One stitch at a time #192: Use a digi.
Crafty Hazelnuts extra #11: Anything goes Christmas.
Created With Love #69: Christmas.
2 Sisters Challenge #172: Anything goes.
Lexi's Creations #104: Christmas.
Divas By Design: Feeling Festive.
Paper Pretties #287: It's beginning to look a lot like Christmas
Cards Galore: Christmas.


Sunday, December 01, 2013

Card Advent Village..

I saw this  advent calendar design made by Gail Milburn in the December issue of Craft Stamper and decided to make a version of my own. Just for a  change I also decided to keep it for myself instead of giving away!
In the magazine  it is shown on a hearth but my fireplace  is just a tad too short  so I have put it in the bay window where it fits perfectly. (unfortunately it would not fit inside my new light box but I  did place the left over  piece of foam core behind each section as I took the photos and it worked a treat to)

I don't have the Sizziz  Artful Dwellings or the TH Numeric so cut out my own house shape designs from thick card and printed my numbers off in word using different  fonts and coloured card.
The papers used are all from the bumper pack of 72 sheets for  £1 that Di and I bought at the NEC.
The clothes peg has been coloured with a Graph'it pen and then covered in home made Washi tape (left over from  one of last Christmas makes).
The hand sign is a freebie from here. You just move the peg along each day.

I raided my Christmas stash of oddments for all the embellishments. Poinsettia is a Poppy stamp die no 861.
 

Wooden sentiments by Dovercraft another £1 buy from NEC.

Other wooden ornaments are by Hely  Cupleditch

Backs of the houses are all covered with the same papers as the front.
All joined together with red ribbon sandwiched between the cardboard and papers.
 
Entering into the following challenges:
Hiding In My Craft Room #126: Free Style.
Pixie's Crafty Workshop # 101: Use up your snippets.
Diva's By Design: Use some red.
Crafting By Designs: Christmas or winter.
Crimbo Crackers #55: Anything but a card.
Just For Fun: Merry Christmas.
Imagination Crafts #6: Merry Christmas.
Feeling Crafty Challenge #23: Christmas.
A little Bit Crafty #8: Christmas cheer.
Crafty Hazelnut's Extra #11: anything goes Christmassy.
 
Also I have inadvertently met the criteria for 8 of the 11 items challenge by Frosted Designs.
using the following:
Tags  =  on  house No1.
Paper layering = Poinsettias on houses  No's 10 and 15.
Washi Tape =   covering on Peg.
Flags/banners =   houses No's 9 and  16.
Circles =  house No 3 (number is in a circle and dp has circles on it).
Stars =  houses No's 5,11 and 14.
Flowers =  houses No's 2,7,18 and  23 + poinsettias.
buttons = house no 2. (has a button above the hanging mittens.)
I missed out on the arrows, patchwork, stitching.
 
So am also entering:
Frosted Designs: 11 item challenge. (Use at least one of the listed items.)


Friday, November 29, 2013

Let there be Light.


The 2nd challenge this month  over at Dreamtime Designs is to create a working light box. The challenge is in 4 parts and each part must be tackled. Now that might seem a daunting task but it really is quite simple if you take it step by step.

Part A.
Do some on line research about creating a handmade light box and  decide which design will better suit you and your needs. Give credit to design in your challenge post.
I had already been thinking about a light box for taking better photos with but had the constraint of storage for a shop bought one so this challenge was ideal. My criteria was simple  it had to dismantle and be put together in seconds and need to fold completely flat for storage under a chest of drawers. Whilst I was mulling this over my friend Di spotted a tutorial on the web and pointed me in the right direction. Here. I liked the look of this so after modifying to my own specifications  this is what I made.

Part B.
Create Light box taking step by step photos .explain each step with how you are putting it together until your project  is complete.  Give/show list of supplies.
I had no idea what foam core was but again my friend Di came to the rescue and told me I could purchase it from Hobby Craft. Thanks Di.

I bought a 5 sheet pack in A3 size. (11¾x 16 ¼).


I used the width of the steel ruler as my guide for making the interlocking tabs and masking tape for marking which sections to cut away. I double checked my  markings before cutting  and used a craft knife which sliced through the foam board with ease.


Here you can see 3 sides slotted together to make sure that it fitted before cutting the last  sheets.

Once they had all been cut I marked the back of each piece with the position they needed to be in to make the box up (they will only fit one way). Here they are piled in the order of contstruction.

The back is laid out first and then the sides are slotted into the base on the  left and right.

The back is slotted in place and finally the sides are folded up to complete the box.

 
The finished light box which I had decided to make the other way up as I wanted my lights to be shining down into the box and not from the front. This also eliminated the need for a separate back drop.

Part C.
 Take a photo of one of your designs without the light box as you would normally have done. This is  your before photo.
 This is my perpetual calendar that  is always on my desk and was handy to use for the experiment. Taken as I normally do using a green cloth background on a table beside my desk. Desk lights are on and to the side of the table.

Take another photo of the same design but this time inside your light box. This is your after photo.
I then put  the calendar inside the light box which I stood on my desk and had the floor white/daylight lamp  and the desk white/ daylight lamp on overhead.

Part D.
Explain  your experience including
1. Has the light box helped you ? if so How?  As you can see from the photos the light box has eliminated the dark shadows cast by the calendars sides  Image  is also more defined.
2. Are you using the light box inside or outside of the house?  Inside as above.
3. Are you using lights? if so which kind? Yes. As explained above.
4.Tell 2 tips or tricks about creating or using the light box.
 
Tips and tricks.
Buy 1 more piece of the foam than you need in case of errors. My pack came with 5 and I only needed 4. (I very nearly cut the wrong tab off of one piece whilst contructing and only just spotted in time!)
Make longer tabs( as I have ) if you will be taking apart each time  as this will save wear and tear on the joints. If the box is to be made up permanently then dovetail smaller so that it fits together snugly.
Use only  light pencil marks  as these are  easier to erase off and use masking tape  for writing on.
Store in a plastic cover as the whiteboard marks very easily.
 
And finally my most important criteria. Yes it fits under the chest of drawers!! It also makes up in under 1 minute. (I timed myself.)

 
Entering into the following challenge:
Dreamtime Designs challenge #2: Construct a light box.


Tuesday, November 26, 2013

All that.

This is one of the cards I sent off to Australia for a swap I did back  in October. It is safely delivered now so I can show it to you. We had to make two cards with glitter on.
 
The card design is one that I saw being demonstrated on Create and Craft and this is my version as it is quite hard to watch and write the instructions down at the same time.( No multi tasking for me!)
This is the front  of the card.
The snowman topper and stripy strips (try saying that when you have drunk a few)
is by Kanban and called 'Snowman Scenes - Blue '.
Blue Glitter card snippets in my stash.
(I have two uncut sheets left which I am keeping for a rainy day!!)
Pale blue cardstock also from my snippets stash.
Silver snowflakes are Peel Offs by  Woodware.
Inside of card.

The front flips over to reveal a space for the sentiment or message.
As this is a swap it has been left blank.

 Side ways view.
You can just see the front flipped over to the back.
The card actually does stand up ok on its own with the side flaps tilted out at an angle.
 
Entering into the following challenges:
Stamping For Pleasure #11: Rudolph Day. Make something festive.
A Gem Of A Challenge: #107: Sparkles.
All Sorts #234: Bring on the bling.
Pile It On #47: Non- traditional Christmas colours. No reds or greens.
Pixie's Crafty Workshop #100: Use up your snippets. Yes Miss.
Creative Craft #24: Non- traditional colours .No red or greens.


Saturday, November 23, 2013

Q is for Quote

The next letter over at the Craft Barn for their Alpha challenge is Q and I have used the word Quote as I am famous within the family circle for coming out with miss quotes or quotes which make no sense. It seemed quite appropriate for this challenge  then  to use one of my most famous ones that the family have never let me live down.

Page has been given a wash of tester pot in 'Tuscan Terracotta'
Stamp was a freebie from Craft Stamper mag. 'Apr 2013'
Letter created using Sizzix Alphabet die 656133.
Snail made from Shrink plastic and painted using a tester pot of white.
 
 
What I had intended to say has long since been lost in history!
 
 
Entering into the following challenge:
The Craft Barn Alpha Challenge: Use the letter Q.
 
 
p.s. I won the Craft Barn challenge for the Letter N last week.