Saturday, December 24, 2022

The Lights are on!

These are the cards I made for the family this year.  I have used the easel card theme with a light battery pack. The hardest part is wrapping the wire of tiny lights around the window cut out  so as not to show the wire when the card is switched on. 

This is our daughter's card.

Below with the lights on.

Our son's card

Below with the lights on.

The Docs card. 
Below  with the lights on.

This was the only good photo I managed to take of a close up of one of the cards lit up. 

Wishing you all 
A
Happy and safe Christmas.
Hugs 

Wednesday, December 21, 2022

Christmas Birthdays.

Both of our Grandsons' have Birthdays in December . One at the beginning and one at the end. They are both growing up so fast and I really struggled this year to come up with a card idea for them.  Grandson number two liked his so hopefully grandson number one will like his too. 


Grandson number two is the younger but his birthday comes first.  I have this number set  by  Sizzix with comes with the 'today' as part of the set so created the card above.


I had to make Grandson number ones' card slightly longer to accommodate the extra year. 

Just getting over a really bad cystitis attack and as I don't want a repeat attack over christmas have  spent a fortnight trying to get a prescription made up on a just in case basis. Fingers crossed I  won't need to use it but  a bad attack is usually followed quickly with another one and then I can go months without a problem. They come completely out of the blue so best to be ready me thinks. 

Hope everyone is just about ready for Christmas. I managed to get my cards all posted out in between the postal strikes and presents delivered by the couriers. 

Have a lovely time  and take care.

Hugs

Wednesday, October 26, 2022

Hanging Window Box Cards.

Time for another new challenge over on the Butterfly blog and this time it is 


Bit of a mouthful but I really didn't know what else to call it. 

Holly Hock = Light Lilac. 


I have 5 examples for you to see. As usual a step by step tutorial is available over on the blog. You can find it under the banner heading on the Card shapes page. All the tutorials are listed alphabetically. Just click on each name and it will take you to the tutorial for that shape card.
Once I got started I kept thinking of different variations and wanted to show them all! It really is a simple card to make with just four scored folds and a die cut shape.

Card 1
Using from the wheel
Hanging Window Box card/Heat Embossing/Hydrangea Pink/Holly Hock/Butterfly.


Design paper is a digi called Butterflies from Crafts U Print designed by Fran Dent
Flowers are a stamp and die cut by Heartfelt Creations called Arianna blooms. Circle dies by Julie Hickey(scallops) and Clarity stamp (plain round). The sentiment is by SU and I have heat embossed in black. Flower centers are glossy stickers. I found it rather fiddly to match up the scallops on the die cut frame to the front of the card so on my next card I reversed the order of using the dies.  It has given a completely different look.  See what you think. 

Card 2
Using from the wheel
Hanging Window Box card/Heat Embossing/Hydrangea Pink/Honeysuckle/Butterfly

The Design paper is from a 12x12 sheet sent to me a very long time ago by a good friend in the USA. This was the very last scrap of it and I even managed to get 3 punched butterflies out of the strip I cut off to fit the box. I believe it might be a SU paper but not sure. The front of the card is card stock embossed with a flower design. Again sent to me from a good blogging friend. The circle frame and the sentiment (by Tonic) have both been heat embossed using clear embossing powder. They really do shine.  Shape folds completely flat for posting. As do all of them.  Both of these cards are half an inch deep and stand up on their own for display. 

For my next card I wanted to try making a little larger and deeper so this card is three quarters of an inch deep and four and three quarters wide but folds flat to measure 5.5" x 6". 

Card 3

Using from the wheel
Hanging Window Box card/Heat Embossing/Holly Hock/Hydrangea Pink/Honeysuckle/Han Blue/Butterfly
so a full house. 


I have quite a few Graphic 45 embellishment cards and as I had two of this design I really had no option but to use one of them here. Especially as three of the colours were on the print. I like the words too by Edward Smith Jones. Paper is a digi called Hearts and Flowers by Funky Hand. Sadly no longer available along with many other sites that have closed down over the past few years.  Butterfly is a die cut which I have heat embossed with clear embossing powder. Die frame is by Creative Expressions a Lisa Horton design.  

Then I had a what if acetate moment and card 4 was born!

Card 4

Using from the wheel
Hanging Window Box card/Holly Hock/Hydrangea Pink/Honeysuckle/Han Blue/Butterfly

I have had this design paper since 2012. Time to use me thinks. It is by Sally Moret. I love her big bold pattern designs. I fussy cut two of the butterflies to add to the finished card. The pink paper is by Glitz it Now called Love You Madly. The sentiment is black glossy stickers.  The heart die is by Tonic but  after I had cut the aperture I realised I didn't have a larger die cut heart to use for the frame so I decided to use the heart already cut and die cut a smaller heart from it leaving an aperture within that heart. Then I realised there wasn't much card for me to attach the heart back onto so acetate came to the rescue to make a screen without hiding the window. I was  pleased with the result so had another go but simplifying how I made it. 

So card 5 intentionally  uses acetate!

Card 5

Using from the wheel
Hanging Window Box Card/Heat embossing/Hydrangea Pink/Honeysuckle/Han Blue/Butterfly


I found this pretty sheet of paper in my stash with no name on the back which signifies to me that it was another gift given to me by a friend. This time I am choosing to use acetate and keeping the design fairly simple. From a distance you can't see it on the card but it is keeping some rigidity  as the yellow card stock is is a light  160gsm. I have used my favourite Memory Box  butterflies and the tiny paper flowers are  from Market 49. I die cut the sentiment (Tonic) and heat embossed with clear embossing powder. 


Hope I have given you some ideas and that you will come and have a play in the Butterfly Garden. All are welcome. Challenge is running for 3 weeks and I have just realised that the next challenge will be the last one of this year before the butterflies bed down for the winter.  They will be back though in the New Year.  Also just realised I only have a smattering of X cards made so best get my best foot forward if I can work out which one it is!!!


 Please try and stay safe and warm. 

Hugs 

Saturday, October 01, 2022

Cube It.

Time for another new challenge over on the Butterfly blog and this time it is 


 Chartreuse = Apple Green. 

A little later than expected due to internet problems. My Wi -Fi keeps disconnecting my pc every few minutes so trying to write a tutorial and load photos for it has been torturous to say the least. Work is being done on the local  transmitter mast upgrading it for when 3G gets turned off next year but in the meanwhile it is proving to be a real pain.

I have 3 examples for you to see. As usual a step by step tutorial is available over on the blog. You can find it under the banner heading  on the  Card shapes page. All the tutorials are listed alphabetically. Just click on each name and it will take you to the tutorial for that shape card. 

This shaped card has been around for a few years but in my card/ version 3, I have given it a new twist that I have not seen elsewhere. 
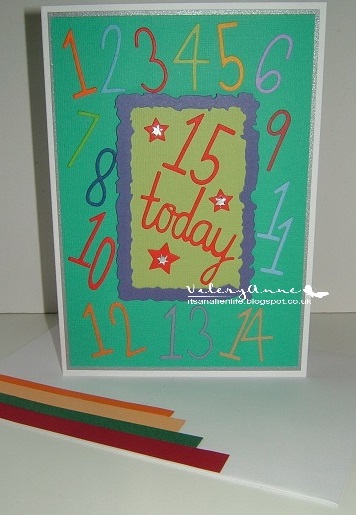
Card 1.
Uses from the Butterfly wheel.
Cube card/Checks/Chilli Red/Canary Yellow/Butterfly

The tartan check paper I have no name for but the Butterfly paper is from Making Cards July 2015 called Busy Butterflies.  The sentiment is from a sheet of cutouts that I have had in my stash for years. Time to use up me thinks.  The little Butterfly die cut is an SU punch.  Such a simple card which looks impressive but folds down to  a 4" square and nice and flat for posting too. 
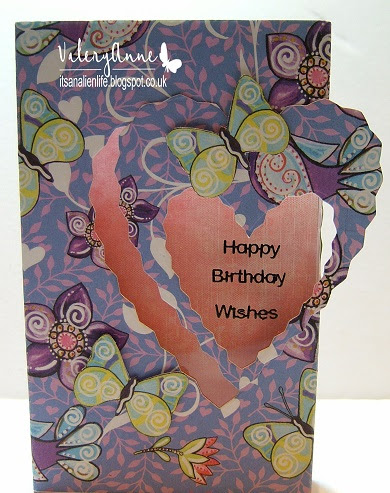

Card 2.
Uses from the Butterfly wheel.
Cube card/Checks/Chilli Red/Chartreuse/Cyan/Butterfly

Is big sister to card No 1. A slightly larger version which folds flat to 5.5" square.
Just gives you more surface area to use and adding more images. 

The  check paper is from Hot Off The Press called Home Grown. The butterfly paper is by Alison Butler whilst the big daisy flowers are by Sally Moret 2012. Large butterflies are my go to dies by Memory Box Isabella and Pippi.
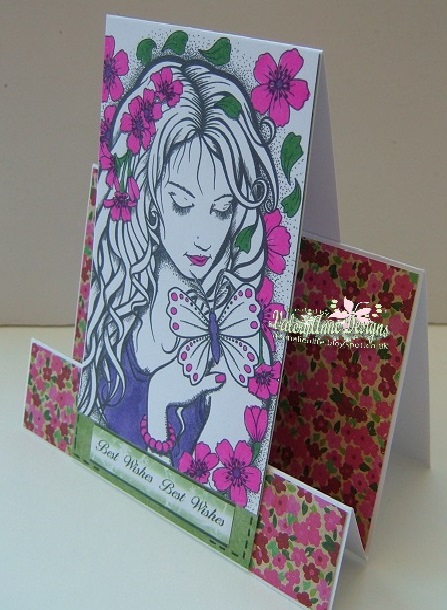
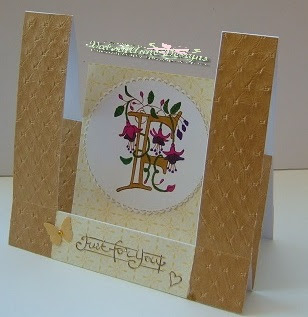
Card 3.
Uses from the Butterfly wheel.
Cube card/Checks/Chilli Red/Canary Yellow/Cyan/Chartreuse/Butterfly
Again one of my 'What if I was to try' moments which I'm calling a Cantilever Cube Card and I love how it turned out.

Instead of cutting individual squares for the cubes I wrapped the design paper around the cubes as it just seemed to lend itself to the Floral Border that I used. I have had this 3D Border By Papermania forever just waiting for the right time. Today was the day!! Check paper by Jenny Ellory and the yellow/floral stripe by  Sally Moret. It matched the 3D border perfectly. 


I have also been away from my desk having jabs done. Shingles and Pneumonia safely out of the way and thank goodness only one offs so no need to be repeated.  The Doc and I have our Covid vaccinations on Monday afternoon and need to go into town for them.Luckily we managed to get appointments 10 mins apart.  That just leaves the Flu jab to sort out with the surgery which they are doing from the middle of October.  I don't think I have any muscle left that has not received a jab in it this year!!

The challenge is running until the 18th October 8pm (GMT) so do hope you will have time to have a go at this card shape. 


Stay Safe.


Wednesday, September 07, 2022

Window Cards

Time for another new challenge over on the Butterfly blog and this time it is 


I have 4 examples for you to see. As usual a step by step tutorial is available over on the blog. You can find it under the banner heading  on the  Card shapes page. All the tutorials are listed alphabetically. Just click on each name and it will take you to the tutorial for that shape card. 

This card shape has several different names but I have chosen to call it a Window card. Just so I could use the letter W!!!!!. 

Card 1.  
Using from the Butterfly wheel the following:
Window Card/ Wood/Wheat/Wisteria/ Wild Blue Yonder/Butterfly


The base card design paper is a digi by Funky Hand (no longer in business) called Hearts and Flowers No 16. I have teamed it up with two freebie papers on the window. The yellow is from making Cards by Nancy Watt and the  watering can/bird house paper is called Summer Time but I am not sure which freebie collection this came from. Both have been in my stash a very long time.  I have used a wooden butterfly embellishment as my theme element.  Card folds flat for posting. 

Card 2.  
Using from the Butterfly wheel the following:
Window Card/Wheat/Water Melon/ Wild Blue Yonder/Butterfly


Just by turning the window shape a different way you can create an entirely different look.  Here I have used a design paper by Pat Bravo on the base card. The blue paper behind the butterfly was lurking in my stash (no name) and happened to be the right size for inserting into the window.  Butterfly is my go to favourite by Memory Box  "Pippi and Isabella".  The sentiment is a die cut by Dovecraft.  Believe it or not the window is the same size as on the card above but it fits this way onto a smaller card base. 

Card 3.  
Using from the Butterfly wheel the following:
Window Card/Wood/Wheat/Water Melon/ Wild Blue Yonder/Butterfly

I had a little what if moment for this card and said 'What if I make  two smaller windows and put them both on a slim line card' so I had a play around with the sizings and did. 
Blue design paper is from the Simply British collection from Homemade a really old freebie still in my stash. The other paper is a freebie from Making cards  June 2013 called Busy Bees. 

Card 4.  
Using from the Butterfly wheel the following:
Window Card/Wheat/Wisteria/ Wild Blue Yonder/Butterfly

Finally I had another light bulb moment and thought what if I use a large and a small window  and combine together  to make a double window!!!! I like how my mind works sometimes.


I have been itching to use this Penny Black Stickeroos  for ages and the blue is just perfect for this card. The creamy coloured butterflies were white on the sheet but I coloured over them with a cream Copic marker and I quite like the result.  I had to chop a small sliver from the bottom of the flower to make it fit the inside of the window.  I will add a sentiment on the inside when it gets sent out. It would work well for several different occasions 


Hope you will come along and play. This really is an easy card to make with so many options.

Hugs 


Wednesday, August 17, 2022

Faux Stepper Card

A new challenge is up and running on the Butterfly blog.


I have 4 examples for you to see. As usual a step by step tutorial is available over on the blog. You can find it under the banner heading  on the  Card shapes page. All the tutorials are listed alphabetically. Just click on each name and it will take you to the tutorial for that shape card. 

This card shape is so easy to make and though it is called a Faux Stepper it really does look  like the real thing. 
Card 1. Sets the panel off to the left of the card. 
Using from the Butterfly wheel the following:
Faux Stepper Card/ Faux Stitching/Forest Green/Butterfly


Bit of a steam punk theme going on here .Both the design image and the green floral paper were freebies from various magazines. I don't have details for them but  they have been in my stash a good long while so time to use up.  Below is a side ways  view of the card. 


Card 2. Sets the panel to the centre of the card. 
Using from the Butterfly wheel the following:
Faux Stepper Card/ Faux Stitching/Forest Green/Fandango/Flirt/Butterfly


The image is a digi from Delicious Doodles called Blossom by Teri which I have part coloured (for more impact) using my Graph'it markers. The sentiment is a magazine freebie from long ago also the design paper.  Again below is a side ways view.


Card 3. Sets the panel to the left  of the card and the image on the right  but set back a level.
Using from the Butterfly wheel the following:
Faux Stepper Card/ Faux Stitching/Forest Green/Fandango/Flirt/Butterfly


Image id a digi by Digi Stamp 4 Joy called Rose Corner and coloured with my Graph'it markers. The design paper another magazine freebie. Sentiment and dots are silver stickers from my stash. Butterflies are a punch by Woodware.  Side ways view of card below. 


Card 4. I have made as a Faux Inverted Centre stepper card. 
Using from the Butterfly wheel all of the elements plus butterfly .


The lovely quilted suede effect paper was given to me by a friend who no longer crafts. The other design paper is from SU.  The design stamp is from Clarity cut out using a die by Julie Hickey. Gold sticker sentiment and butterfly from my stash. Sideways view of card below. 


Hope you will come along and play. This really is an easy card to make with so many options.

Hugs 


Wednesday, July 20, 2022

Spanner Panel Cards

A slightly longer sojourn than anticipated but I am back now with cards to show you for the next Butterfly Challenge #171 .  As always instructions (for making the card shapes) are over on the Butterfly blog and stored under the  banner at the top of the page here.

Card 1.
Uses Spanner panel card shape/ Butterflies//Sage/Sky Blue.
There are 3 layers to each of the cards. The first layer has the spanner joining piece which you can see here is made with a strip of acetate and a punched butterfly eding. I decorated the side panels with the out cuts from the punch. Authorities will insist on keep sending me bills to pay and the brick effect paper on the panels is the inside of the envelopes that they come in. Might as well get some pay back!!!

The centre panel is a slightly cut down sheet from a Hunkdory Little booklet set. 
The back panel has the sentiment which is by Woodware and an SU punched butterfly and more of the brick effect paper which I have tons of.( I have tried asking them not to send me the bills Lol.)

Card 2
Uses Spanner panel card shape/ Butterflies/Sand/Sage/Sky Blue.
I don't have a make for the swirly design paper but the Floral is from Crafts Beautiful 2239. 1 of 2 designs. Butterflies are a large SU punch and the sentiment is by Woodware.
Here I have used design card paper and the sentiment for my spanner bridging piece. 


Card 3
Uses Spanner panel card shape/ Butterflies/Stripes/Sage/Sky Blue.

The green stripe design is digi paper "Misty Madness" by Funky Hand. Sadly no longer in business. The butterfly design paper is from Paper Craft Essentials. Butterfly dies are from an old set by Tonic Studios.  Sentiments were magazine freebies. 


Card 4
Uses Spanner panel card shape/ Butterflies/Stripes/Sage/Salmon.
Card has already gone to its recipient as The Doc needed a card for his cousin's Birthday this Friday.
The design papers on the front are the double side of a  Mind's Eye  pad by Jen Allyson called Lost and Found. Stripey design paper is by Hunkdory 'Boutique Chic' from Paper Crafter Magazine June 2016.  Flower stamp and sentiments are magazine freebies. I have used design paper lace and ribbon for my Spanner bridging piece. 


I had hoped that I would be through with doctors and hospital appointments but I still have a blood test tomorrow at one hospital and then next week a CT scan at a different hospital in the opposite direction. I then still have a further appointment to attend after the scan results have been seen.  So far it has been found that my Immune system  has turned on itself  so I am now on pills for life and injections every 6 months just to keep me ticking over. I also have Raynaud's Secondary Phenomenon due partly to the ongoing  problems which my immune system is throwing up. I have been on the life pills for 6 weeks now but still get incredibly tired during the day and don't feel like getting up to much on most days so please bear with me  as I get more back into the swing of things. 
Anyway onwards and upwards as they say. 

Hope you will come and have a play in the Butterfly Garden which is looking really pretty right now and full of butterflies plus birds and those nice/pesky squirrels . Challenge is running for 3 weeks. 

Hugs
and continue to stay safe.